
So, are you a designer ready to use overlays in your UI or banner? One thing is for sure this effect works in almost everything, so it needs some attention from creators like you. It works for social media posts, images, and everything graphic design.
Then how can you make your overlays unique? So, here is an article about the best Adobe Photoshop overlays and how you can use and download them. So, let’s go!
Why Do They Even Matter?
So, this one must come to your mind, especially if you are just starting your journey! So, here’s the answer:
- It offers you to stack up one image over another.
- This way, you can have transparency to create a design and draw attention to a specific design element.
- Also, you can try adding a blend of two images and make them look connected.
So, these benefits give stems to many others you can have for your design’s beauty. These benefits go a long way to creating design innovations that stand out and matter. You can get the best Photoshop overlays tutorials in this article.
How To Use Overlays in Photoshop?
We have methods for 3 top overlay types in this fantastic software—the perfect ones out of the best Photoshop overlays. So, there we go!
Sunlight Shadows Overlays
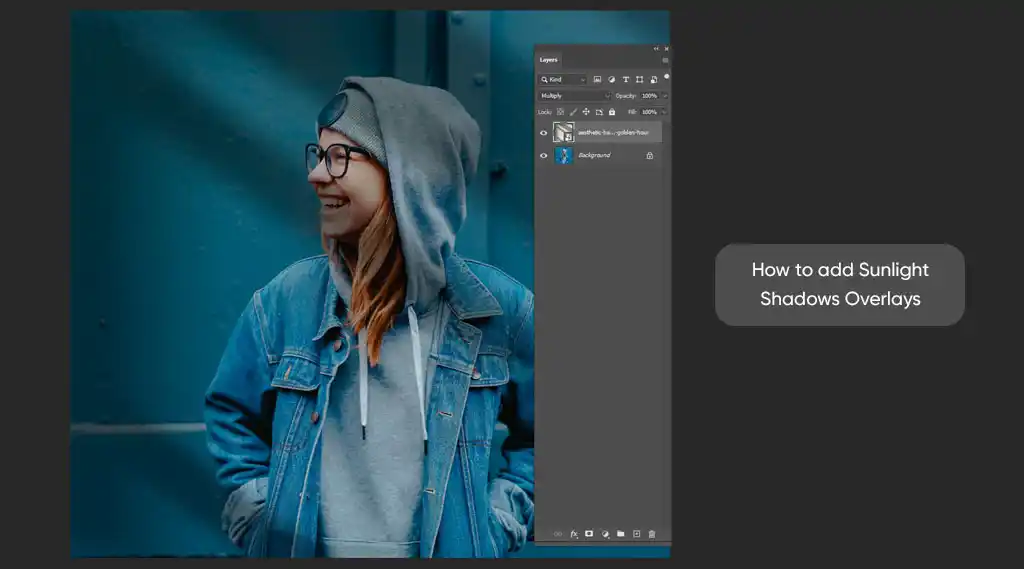
- Now this one is my personal favorite for a big reason of being able to add sunlight without it even being present there. So, this is how you do it:
- Start by adding an image that will start your journey.
- Ensure you create a new layer by going to your Plus icon.
- Name your layer and select the Rectangle Tool.
- Set your foreground color to white to ensure you can create a beautiful overlay.
- Then, create a shape on the subject if you want to create a sunlight rays effect.
- You can add other effect impressions by utilizing your creativity in the design.
- Ensure you add opacity to your layer and press Alt+Control+T.
- This way, you can add the same distance to every layer you create on it.
- Also, you should press Control+T, right-click, and then the Distort option.
- Then you can drag according to your needs and press Enter.
- Next, you should select the Blending option and add a certain opacity.
Also, you can use the Eraser tool to bring a natural feel to your design.
It is one of the ways of adding this overlay to your designs. You can try other ways to make it look impressive; keep your requirements in mind.
Color Overlays
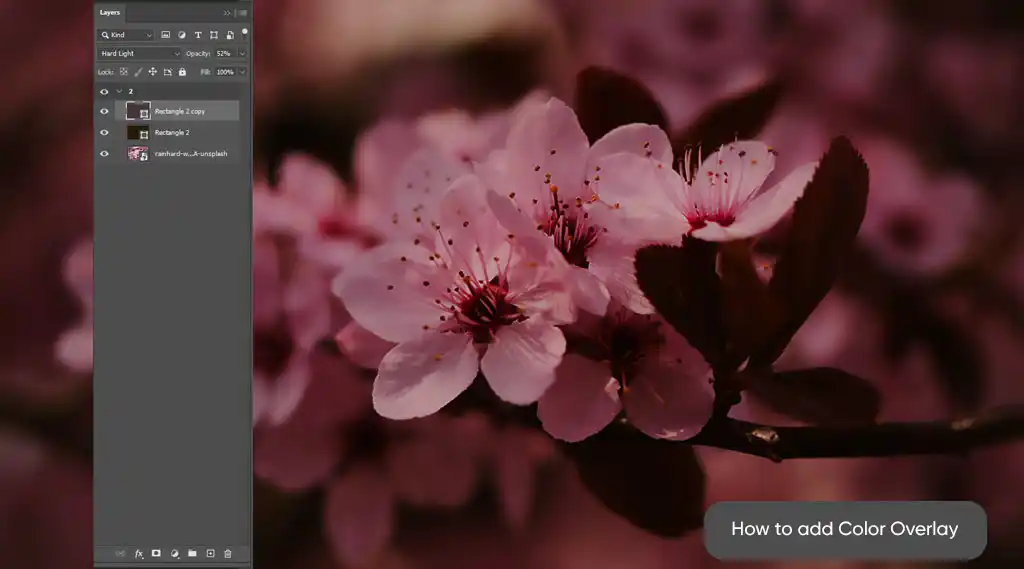
Adding colors to your design may look like something you do in your daily routine. But what if you add something that blows your audience’s minds away? Well, you can undoubtedly make dozens of such effects, so let’s see this one:
- Add the image, and you can create a shape for your work according to your canvas. You can also change and enhance the color by adding modes from the Modes dropdown. This way, you can have a more realistic look for your overlay and design.
- Next, double-click on its layer, and then you can go to Windows and choose your color overlay.
- Then, you should select the color suiting the image.
- That is it; your color is already there.
Ensure you change the overlay opacity in the window open.
This is one of the ways to get a unique overlay with ease, so easy peasy!
Adding Wing Overlay
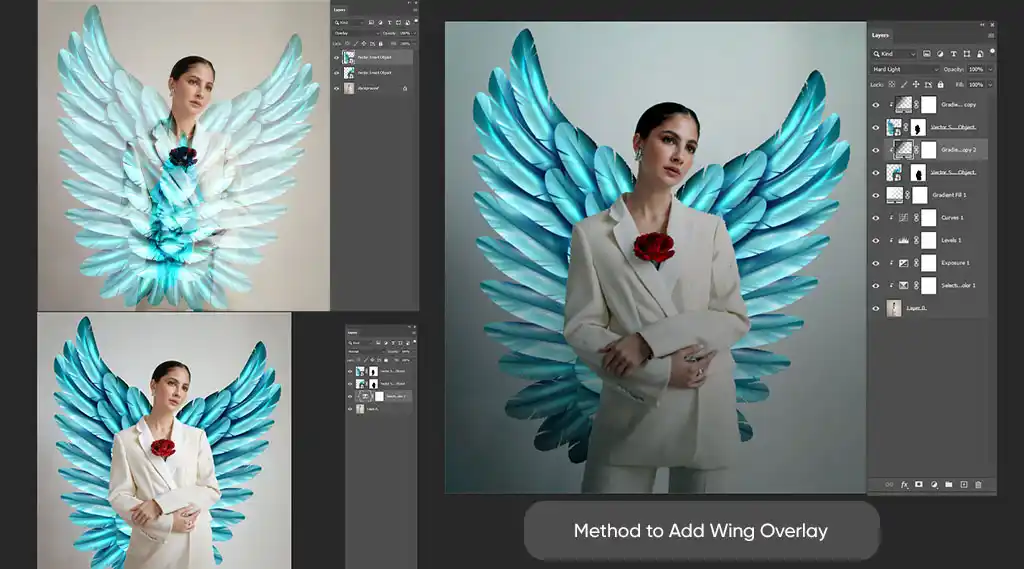
This one is special and works to make your subject look like an angel (you can also try devil wings, loz). So, here we go to make them look like angles:
- Open your image
- Go to your File option and then Place Embedded.
- In the next window, you can select from multiple wings. Choosing according to your subject can help you get a beautiful look.
- Then, select the place on your subject you wish to add your wings.
- Ensure you add the wings at the right place; you must make them look like angels.
Keep the subject’s angle in mind when adjusting their wings. - Then, you can click Enter and select Add A Layer Mask option.
- You should have black as your foreground color.
Select an appropriate size to meet your needs
Adding shadow behind wings:
- Make a selection on the wings and ensure you remove all the extra wing parts from the foreground.
- Then, go to the opacity option and set it to 100 to make the wings more prominent.
- Add shadows by selecting the wings and selecting the Brush tool.
- Then, select Burn and turn your brush size to 1000.
- Also, ensure you set the Hardness to Soft and click on Add.
- Then you can see a window; click Ok only if you do not have to make further changes.
- Try adding a bit of depth, and you are done. This way, you can create an angle from a simple, normal-looking image. So, a virtue of turning a person into an angel, lolz.
How To Download Free Photoshop Overlays?
Downloading your PSD file will feel like heaven. So, here is how to enter this blissful land:
- Go to Freekpik.com and download your file
- It can be a PSD file, and you can convert it into a PSD if it is any other format.
- Your source file can open in Photoshop if you want to use it as a single image.
- Also, you can drag the layers into your existing project by grouping them.
- This is it; you have any layer you would need to use.
Note: There are other websites, like freepik.com, but they do not provide royalty-free overlays for free. You can use these overlays without having to worry about any copyright issues.
Final Thoughts
We gave you methods to use 3 different types of overlays in Photoshop and how these overlays allow you to get more attention to your content and add effects that make your designs look stupendous! So, using sunlight effect overlay, wings overlay, and color overlay can improve your designs’ impressions.
Plus, you can read about downloading these effects from Freepik.com and using them in your existing project.
Leave a Comment