Adobe Photoshop is famous for a reason, and we all know this reason. The thing is that Adobe Photoshop is the most reliable tool for your creativity. It perfectly meets your needs and fulfills your creativity for your audience’s aesthetic fantasies. So, we have some tips to help you create a 3D Letters Text Effect. In addition, you can read about how you can add them to different types of graphic jobs you do. You can
Why 3D Effects?
Now this question is just for beginners, but if you want to convince your client why 3D effects can be helpful?
The software is known for having amazing effects for text backgrounds and even animation. That is why you should learn how to use the effects to perfect your design creativity and meet your client’s needs.
Types of 3D Effects In Adobe Photoshop To Choose From?
● Anaglyph 3D Action
● Isometric Illustration – 3D Generator
● Gold Text Effect Photoshop Action
● 3D Effect Photoshop Action
● Real 3D Text Mockup Photoshop Actions
● Stereoscopic Effect Action
● Dispersion Photoshop Action
● Fiery Text
● 3D Mosaic Cork Text Effect
● 3D Chrome Generator
● 2-in-1 3D Pop-up Sketch
● Isometric Photoshop Action
● 3D, Shiny, Inflated Text Effect
● Mosaic Cork Text Effect
● Marquee Bulb Sign
● 3D Letters Text Effect
So, we have all the top 3D text effects you can find and use in the Adobe Photoshop software. In addition, we have a guide you can use to make 3d text after effects. These effects are among the top solutions that create amazing and impressive results for your projects.
How to Add 3D Letters Text Effect?
Now, you can read about how to make 3D text after effects in your next parts.
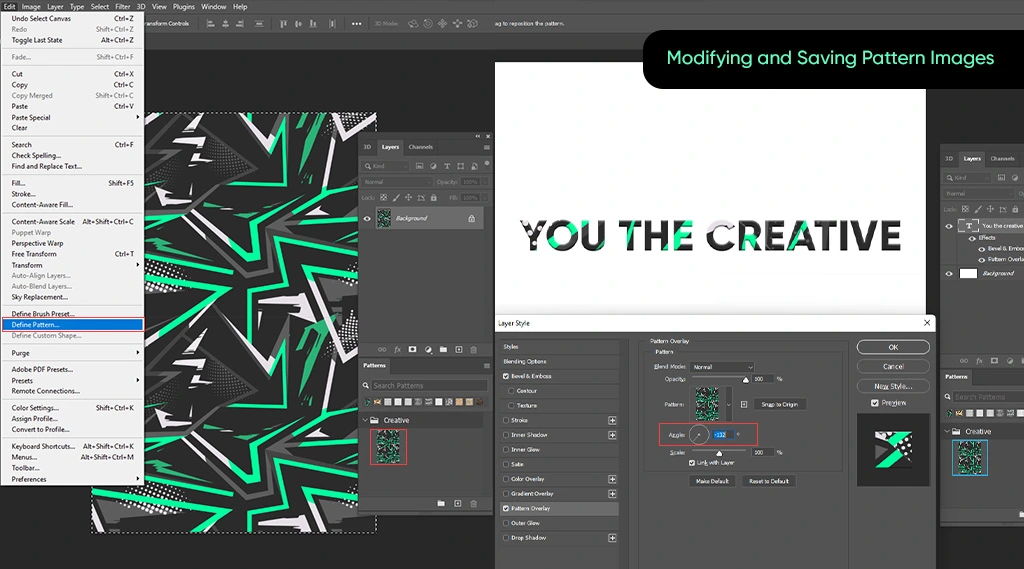
Modifying and Saving Pattern Images
We have the complete process you must follow when using this effect for your designs.
Follow these:
Start by going to the “File” and then “Open,” and you can try the “Abstract Background With Sport Pattern” file.
● Next, you will be able to see a box which is called Rasterize EPS Format.
● Here, you can change your “Mode” from the existing one to RGB color. Then, you should uncheck the Anti-Aliased box, which will allow you with more impressive colors.
● Next, you need to remove an issue from your image, which you can do to create continuity.
● Make sure you select the Rectangular Marquee Tool around the image. It is ok if your selection could be more precise as you can eliminate issues in the next steps.
● You can try using “Transform Selection” by right-clicking, zooming, and dragging each edge.
● Save the changes by going to “Edit” and “Copy,” which you get as an option when clicking “Return.”
● Next, create “Clipboard” dimensions, click Edit, and then “Paste.”
Next:
• Go to the Move Tool, press the Shift Key, and then drag the image to the center.
• Then, you can select both layers and press Command and E or Control plus E on a PC, which will help you merge the layers.
• Make sure you save the pattern for which you must press Cntrl+A and select. Then, you can go to “Edit” and “Define Pattern” and save it as a pattern.
• Last but not least, save your remaining pattern as images. Make sure that you select it and copy-paste the remaining pattern.
It is one of the best Photoshop 3d text effects in this software, so it is great for beauty.
Creating Text Shape Layers
● In this step, you can create a new 1000 by 626 with a document background.
● Next, you can create your text in All Caps to make it look more attention-grabbing and catchy. You can try using the HWT Artz font with a font size of 350 pt.
● Also, your tracking should be 50.
Adding Pattern To Text
• Then, you can convert it into a smart object and create a rounded rectangle.
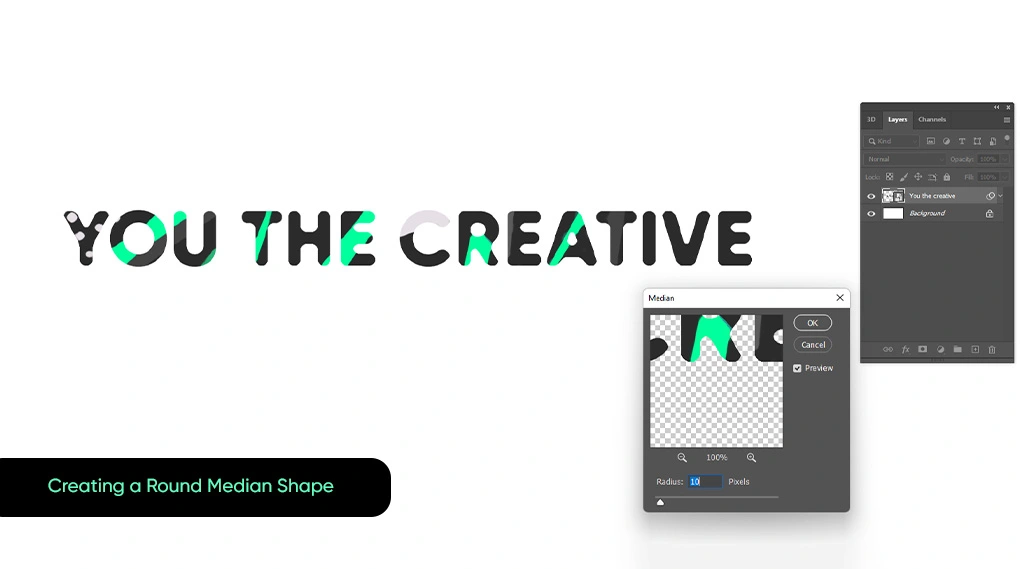
The Next Step: Creating a Round Shape
A round is one of the most important parts of any design that would work with this effect. So, you can try using it to make a look and to ensure that it perfectly makes a unique and beautiful effect. So:
• Make sure that you make the text layer a smart object. All you have to do here is to right-click the object and convert it into a smart object.
• Then, go to “Filters,” “Noise,” and use the Median filter to change the image radius. Preview your image to get the best roundness you need and adjust the pixels accordingly.
3D Layers Creation
In the next step, your 3D layers will be ready, and you can do it by:
● Go to the 3D panel and then to “3D Extrusion from Selected Path.” Also, you should select all your layers, then the 3D panel and the “Merge 3D layers” option.
● Next, you should click the “Properties” panel and make any settings changes from the Properties panel.
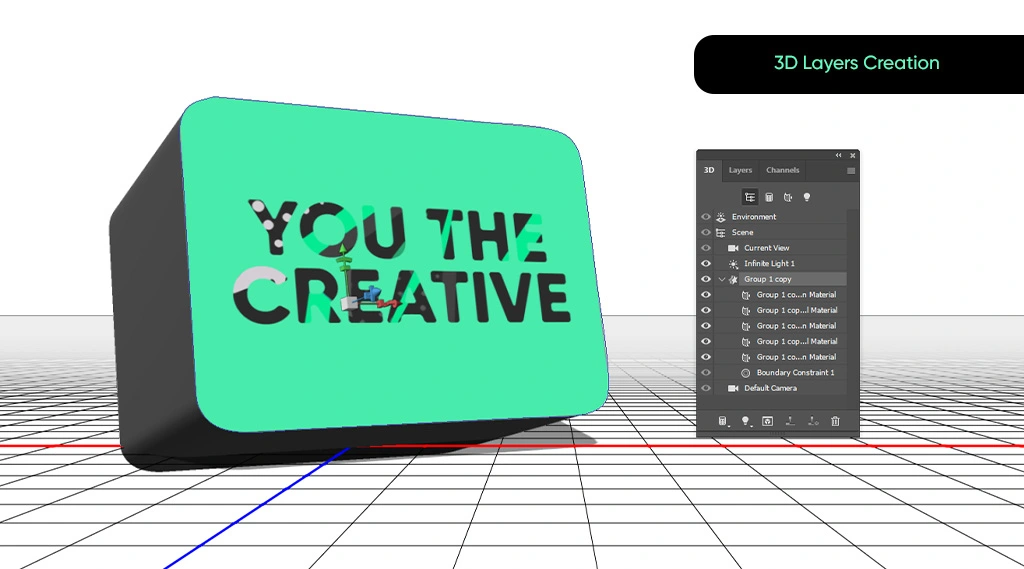
● You can find 3D Modes from the Move Tool from the “Options” bar.
● Using modes will help you with the current view angle you need.
Adjusting 3D Mesh and Cap
Next Steps:
● Go to the “3D Panel,” where you can select the “Text” and “Slides” tabs.
● You can change the extrusion depth, which can be done from the properties panel. Make sure that you take 30.
● Next, you should select the “Back Pipping,” and you should also select “Front Piping” tabs. Make sure you change the “Extrusion Depth” and make it accordingly.
● Go on, select the “Text” tab, and click on the Cap from the properties panel.
● Then, you can change “Sides” as there are specific changes you should make. Try to use “Bevel Width” accordingly and change “Contour” by making it “Half Round.”
● Make sure you change the “Inflate Angle” to 90 and take the Strength to 7.
● Go on and select Back and Front piping and then click the “ Cap ” icon.”
● Next, you should change the “Settings” of the “Sides” from Front to Back and the “Bevel Width” you set to 15. Make sure you change your “Contour” to “Half Round” and your Inflate Strength that you can take to 10.
Move 3D Meshes And Adjust Camera Views
Next Steps:
● Start by selecting “Move Tool” and use the “3D Axis” to help move the “Back Piping” mesh.
● You can try to use the arrows for moving the mesh, and the part you see under them will help you rotate.
● Try to click and drag the part, and next, you can change “Current View,” which will help you with a better view. This way, you will understand what you are doing in a better way as you can choose the “View” menu from the “Properties” panel.
Creating Pattern Material
Next Steps:
● You can go to the properties panel to change the “Specular Color” and shine. But first, make sure that you select all tabs in “Text Mesh Material.” You can make your shine to 100 percent and Specular Color to 7,15,24.
● Next, you can go to the Text Mesh tab and 3D Extrusion to separate your letters.
● Next, select your “Text Front Inflation Material” tab and click the “Diffuse” option. Also, you can choose the “Replace Texture” option to open the first image you saved at the beginning of this article.
● Then, go to the “Diffuse” option icon and choose “Edit UV Properties.”
● Make sure you adjust your “Tile” and “Offset” values for the desired results.
Adding Bump Texture
Next:
● Go to the “Bump” and select the “New Texture” option.
● Next, you should set your width and height values. Make them 512 and change the resolution to 300.
● Perfect if the texture file opens; if not, click the “Bump” texture icon and choose the “Edit Texture” option.
● Make sure you duplicate your “Background” layer once the files open.
● Then, change the “Pattern” and “Scale” settings. Make you “Scale” 50 percent and “Pattern” to Denim.
● Go back to your 3D scene and close plus save the File.
● Change your UV Properties for your Bump, zoom in, and monitor the results you see.
● You can change your “Bump” value to 5 and the other values you like.
Saving and Reapplying Material of Your Choice
Next:
● You can click the “Material Picker” and ensure your “Front Inflation Material” is active.
● Go and click your pop-up icon, then choose the “New Material” option.
● You can type in the name of the material you want to add, then click “Ok.”
● Select the “First Text Material” tabs; only leave the “Extrusion” tab, and you can open Material Picker. Then, you can scroll to the material icon you saved.
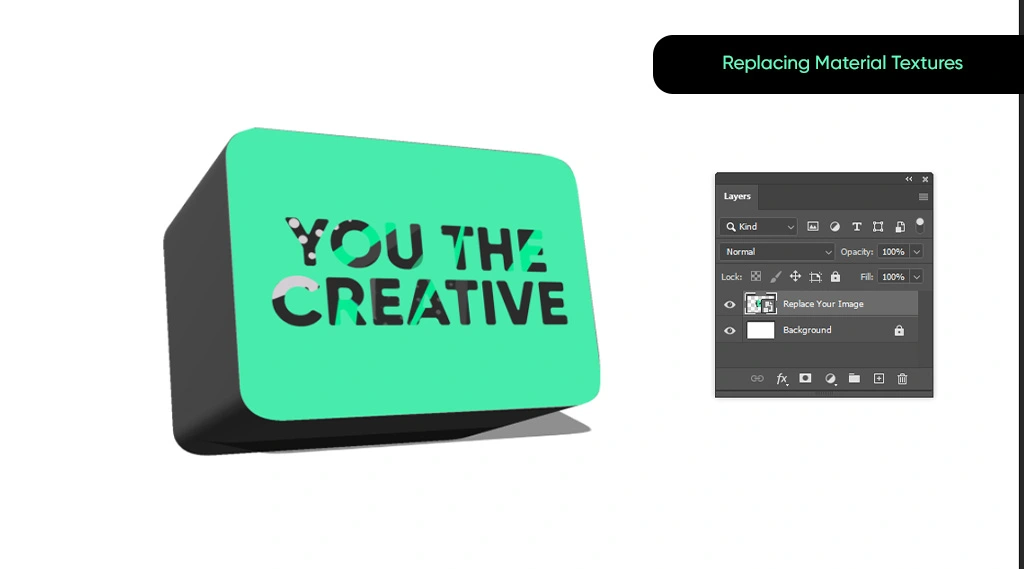
Replacing Material Textures
● This step starts with saving material that you can use for “Second Text Font Inflation,” “Back Inflation Material,” and “Front Bevel Back Bevel.”
● Then, you can select the Text Front Inflation Material tab and click the Diffuse Texture Icon.
● Next, you can choose “Replace Texture,” which will help you with a new pattern image.
● You must select the “Text Front Bevel, Back Inflation Material, and Back Bevel tabs. Once they are selected, click the “Diffuse” icon, and then you can choose the name pattern.
● You get the pattern from your list and replace each and every material one by one.
● Also, you may like to change your “UV Properties” for your new texture. Once done with this step, repeat it to every letter to ensure you add the same effect.
Simple Piping Material
Next:
● Start by selecting the “Front Inflation Material” tab for the “First Piping” mesh. Try to click your icon of texture Diffuse. Then, you should “Remove Texture” and change your “Diffuse Color.”
● Next, you should click your folder of Bump and choose the texture from the Text Front Inflation Material-Bump list.
● Then change your Bump values to two once you have edited the “UV Properties.”
● You can save the material and then apply Piping Materials, and this way, you can tile the Extrusion Material, select the mesh tabs, and then set your Tile from Texture Mapping.
● Then, you can return to your Piping Extrusion Material tabs and edit your UV Properties. You can save and apply your material to the remaining Piping Extrusion Materials.
Next, Reposition Your Letters
● In this step, you can select the first letter’s Text, Sides, Back Piping, and Front Piping tabs.
● Then, use the 3D Axis, and try changing the Coordinates values that you can do from the Properties panel that you can use for moving the letter.
● Next, repeat the prior process to set your letters precisely.
● Also, select Move Object to Ground Plane from your 3D panel menu icon.
● Repeat the same process for all letters and select your mesh group tabs.
● Try pushing them downwards; this is how you can add the effect of the letter resting by creating a weight illusion you want to place them on.
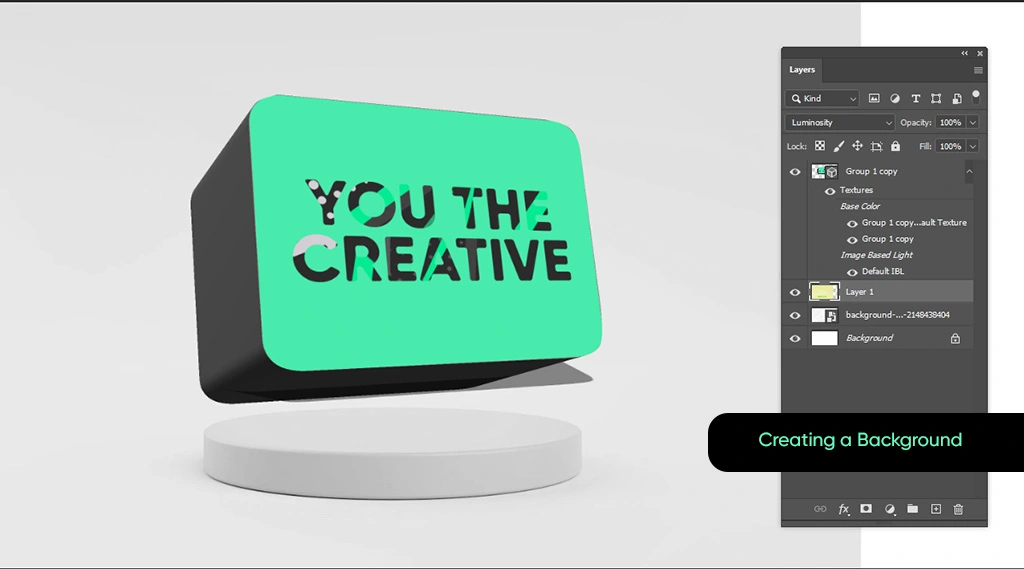
Creating a Background
Next:
● Go to File, and then Place Linked and you can open your image in an empty, clean white room with branches decor 3D rendering.
● You can resize it according to your requirements and rename your Background Image.
At this point, you have a good image that looks super impressive for a starting draft. Also, you can make it look special with other effects that can improve your image beauty. Try adding some other effects to make it look special, as it would definitely add to the overall beauty that your image will carry.
If you want to add other elements to your picture, you can add them too. This amazing Photoshop 3D text effect will help your photos look more beautiful. So, this is how you can 3D letters text effect.
So, this effect works for any cool designs and images you want to create for your projects.
Final Thoughts
Adding a 3D Letters Text Effect can make your content look super special. So, you can use this impressive tool for the super-impressive beauty of your designs and images. Try out your amazing skills and make something unique today; try this effect to make your content look graceful yet impressive.
This guide can definitely bring more beauty to your skillful journeys of graphical content creation. So, perfect your results with a new skill that works impressively well for a great 3D effect that shows your work’s beauty.
Leave a Comment